SmartHome Shutters Voice Control
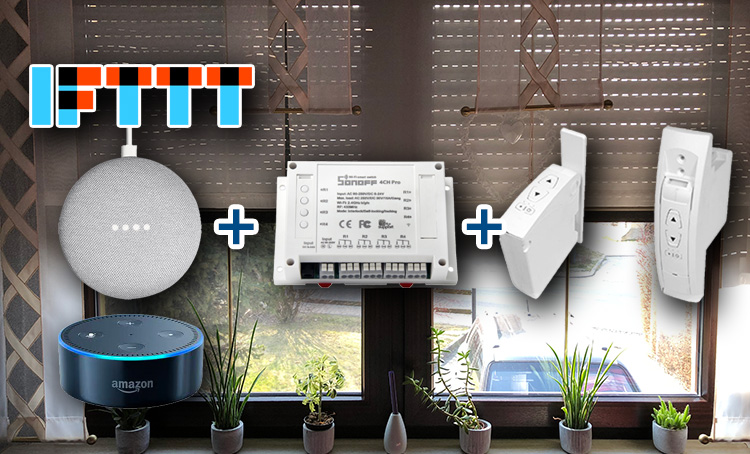
Alexa/Google Home Shutters Voice Control with Sonoff 4CH Pro & Superrollo GW60
What is needed?
- Electric belt winder - Superrollo GW60 or similar article
- IFTTT Account
- iOS or Android Smartphone
- Sonoff 4ch Pro
- Ferrules and crimping tool
- flat 4-core cable
Let's go
- open the flap with controls from the belt winder
- unscrew the board inside and release it from the connection cable
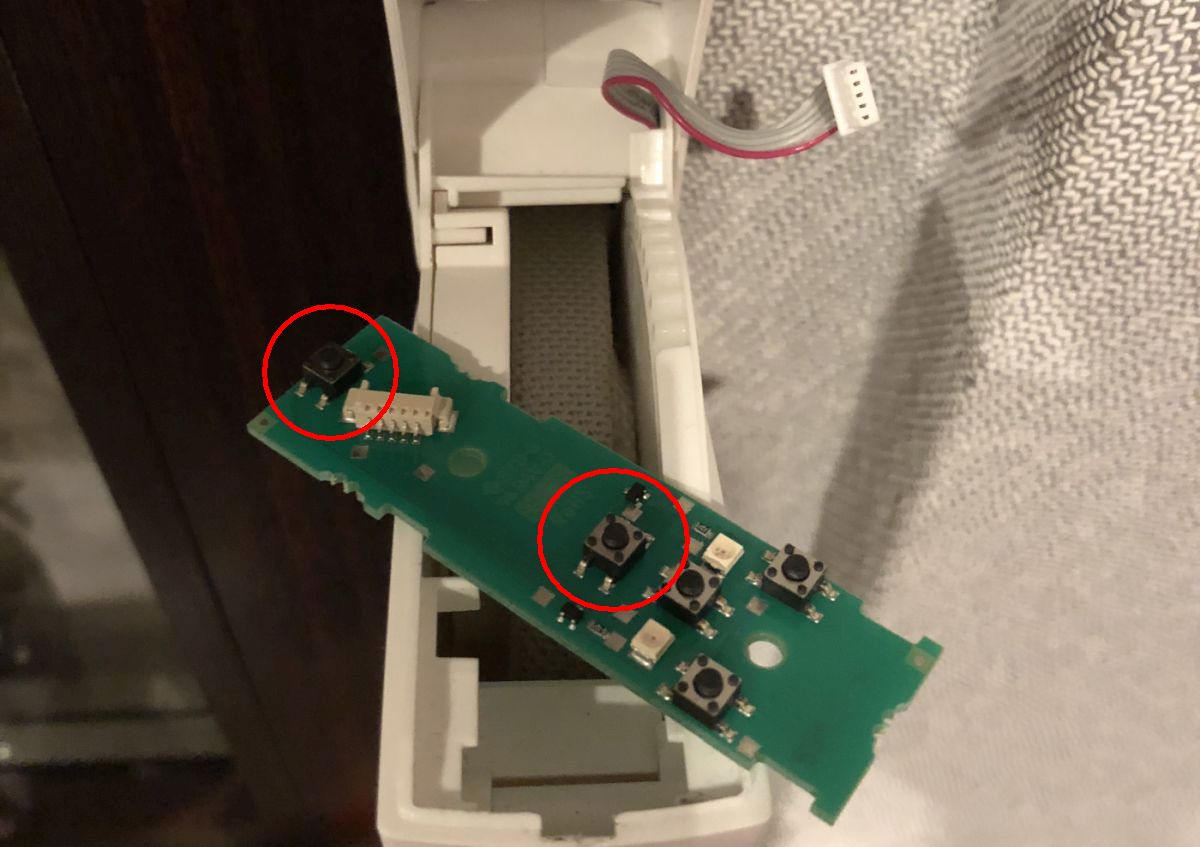
- on the marked buttons, the 4 wires of the flat cable are soldered crosswise (remember the color of the veins so that you can connect them later correctly)
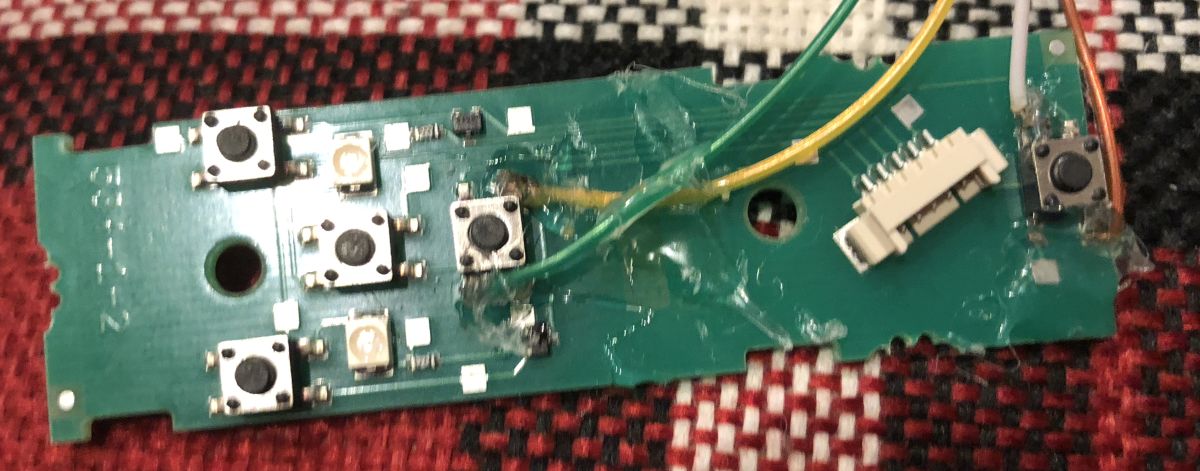
- fix the cables with hot glue
- unscrew the belt winder and lay the cable, in my case I had to create a little space for the cable (e.g. , meltdown a small recess with a soldering iron)
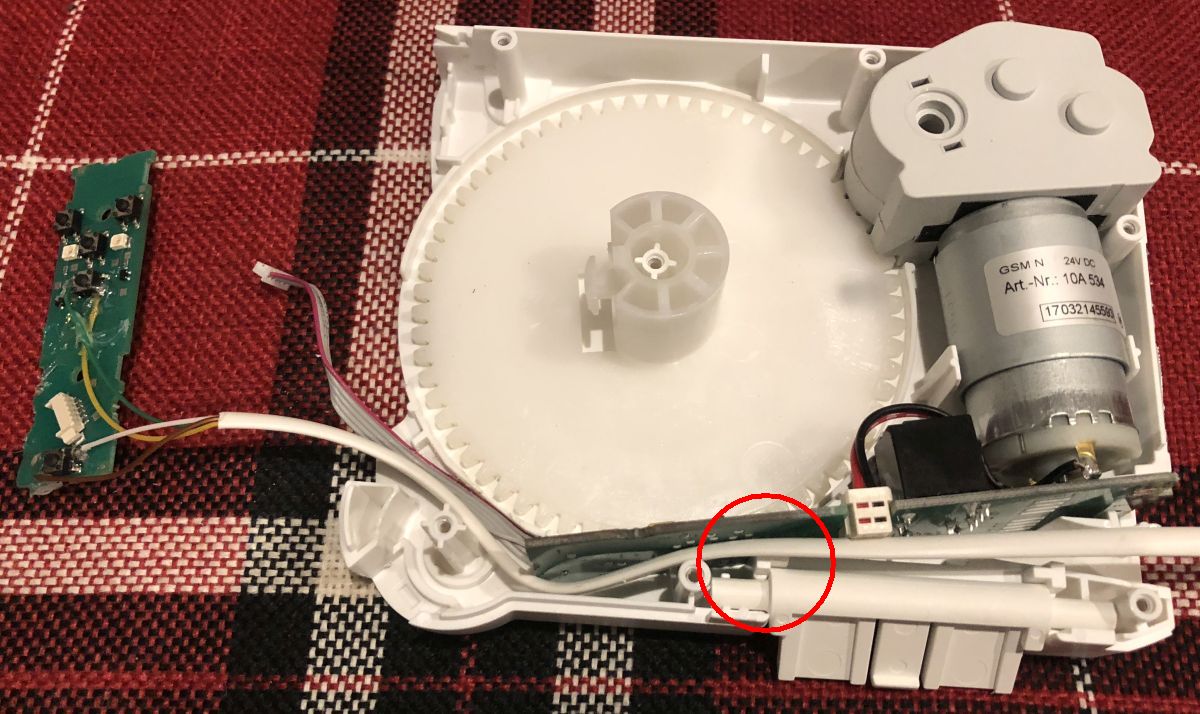
- reassemble the belt winder, screw on the board and make sure that no cable is squeezed
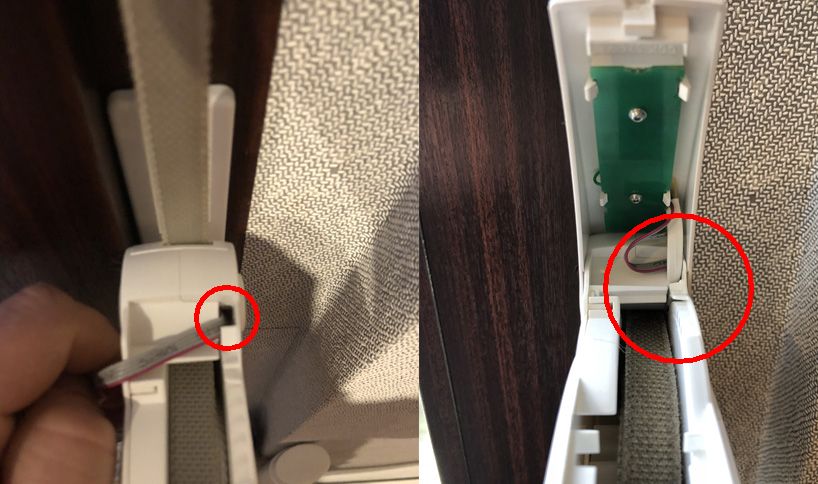
- plug in the power supply of the belt winder and set start- & end point and running direction according to the instructions
- now set up the Sonoff 4CH Pro, set the small switch (lower marker) to
1(for inching mode), then set the 4 small switches (upper marker) all toon, here the ON/OFF switching delay is set (0.25 seconds)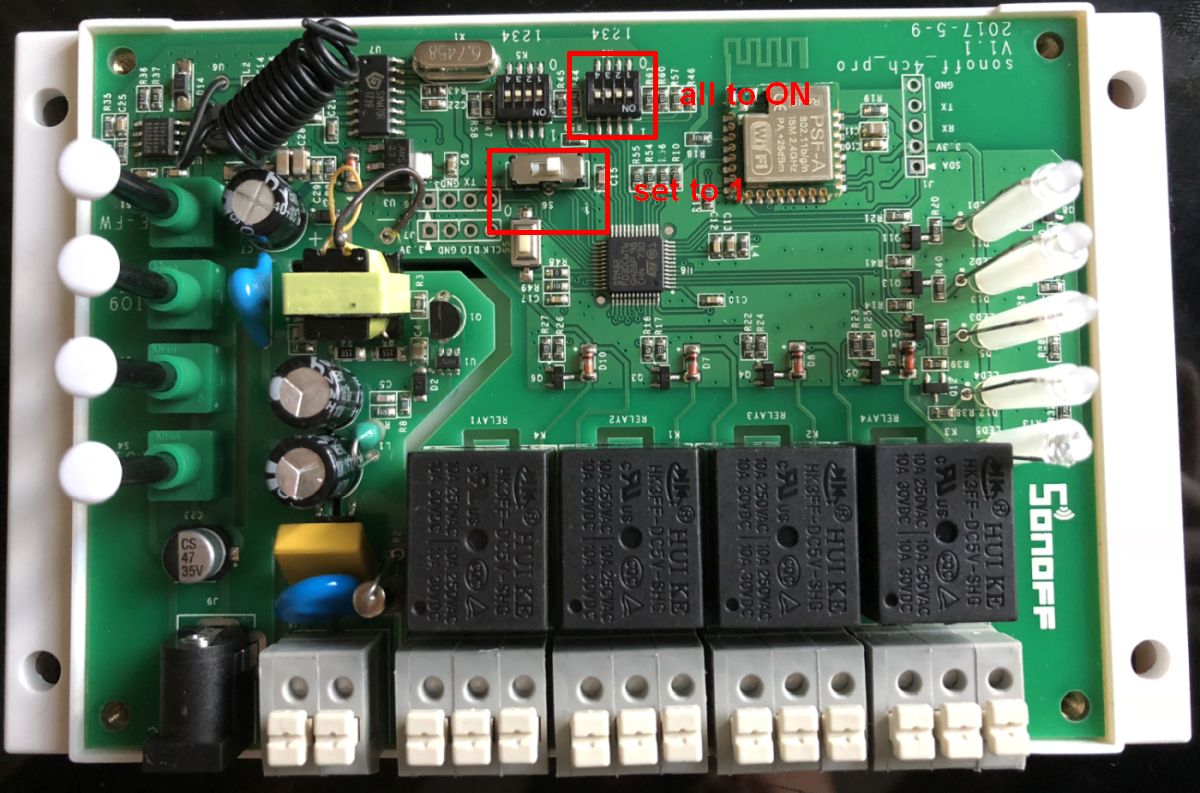
- now provide the 4-wire with a ferrule and connect to the Sonoff 4CH Pro, each of the correct colors for up and down
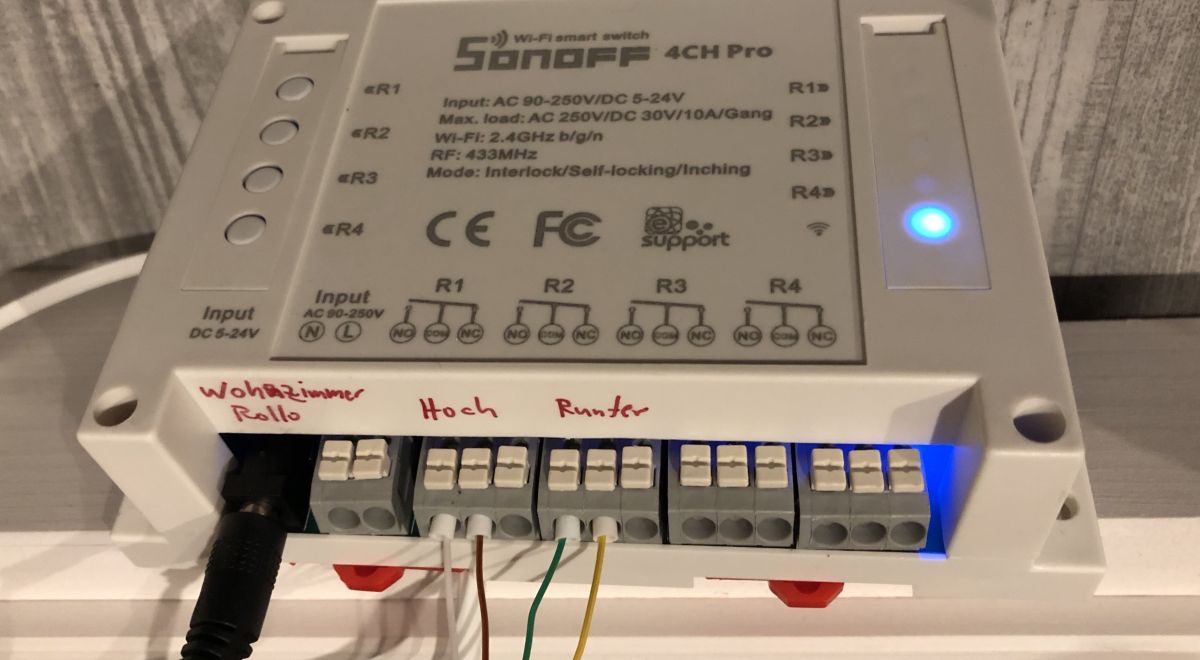
- now register the Sonoff 4CH Pro with the eWelink APP in the cloud and name the 2 switches for up and down > the first test with the APP can begin.
if desired add scenes so that all shutters can be raised or lowered at once.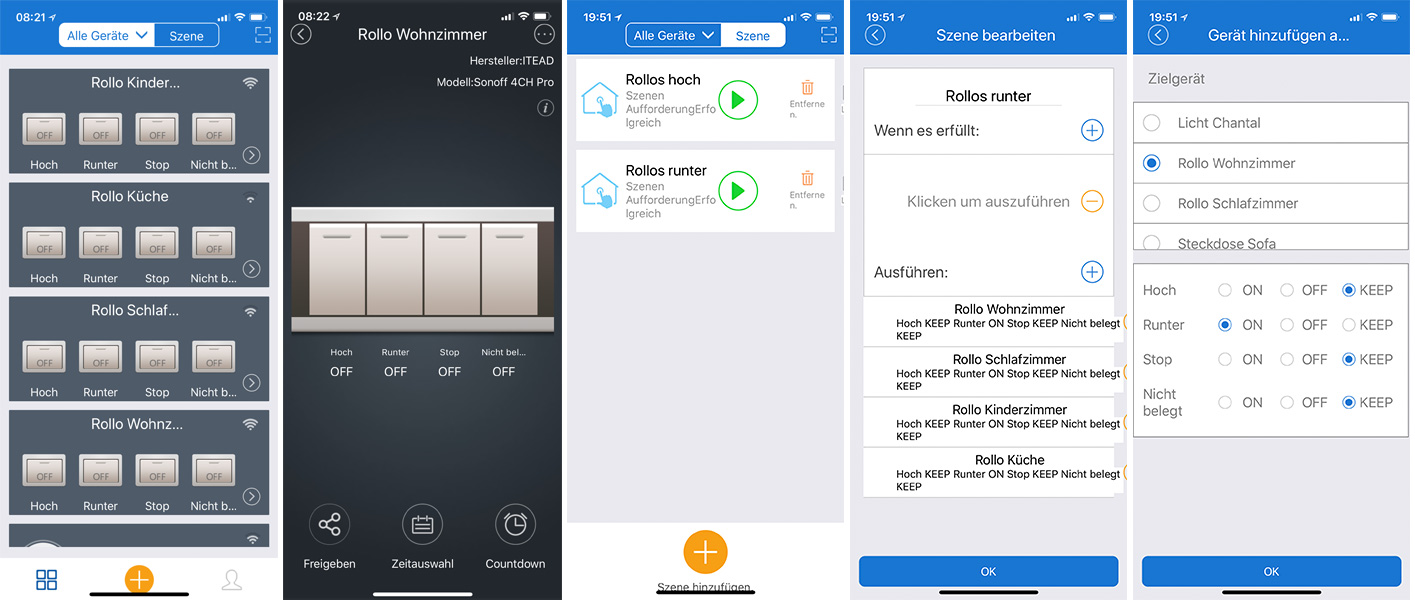
- finally set up IFTTT for voice control > see examples below

Hints
Costs: about 100 €
Time required: about 2-3h
Proper laying of the 4-core cable in the roller shutter drive is extremely important. If the cable is not laid correctly, it may happen that it is destroyed by the internal gear wheels (this happened to me).
My first idea was to use the Sonoff RF Bridge and the Radio Set ZB40 for the Superrollo GW60. This test failed miserably. Reason: the Sonoff RF Bridge supports only fixed RF codes but no rolling or dynamic codes!
IFTTT
If You say "Living Room Shutters Stop", then turn on channel 1 of Shutters Living RoomIf You say "Living Room Shutters Down", then turn on channel 2 of Shutters Living RoomIf You say "Living Room Shutters Up", then turn on channel 1 of Shutters Living Room
